

Even the best-installed electric fence can occasionally develop faults due to severe weather, creeping vegetation, component wear, or accidental physical impact. When an alarm goes off at 2:00 AM or a digital voltmeter shows a sudden drop in line voltage, knowing how to systematically diagnose the problem saves hours of frustration and avoids unnecessary technician call-out fees.
Because an electric fence is a continuous electrical circuit, every symptom points directly to a specific physical or electrical condition along the line. Below is a practical, step-by-step troubleshooting guide to diagnosing and resolving the most common electric fence issues: low voltage, dead lines, ground faults, and false alarms.
Safety First: Tools You Need Before Troubleshooting
Never attempt to test an electric fence by touching it, using a blade of grass, or connecting a standard household electrical multimeter. Standard multimeters are rated for 600V to 1,000V and will be permanently destroyed—or pose a severe shock hazard—when exposed to 8,000V fence pulses.
Keep three simple tools on hand for safe diagnostics:
- Digital Electric Fence Voltmeter (or Fault Finder): Specifically designed to read pulses up to 12,000V+ safely without grounding through your body.
- Insulated Pliers and Cutters: Rated for high-voltage handling when adjusting ferrules or tightening loose joints.
- Cut-Off Switches: Built into your fence zones so you can isolate sections safely without walking all the way back to the energizer.
Step 1: Isolate the Energizer from the Fence Line
Whenever your electric fence stops pulsing or suffers a severe voltage drop, the very first diagnostic step is determining whether the fault is inside the energizer or out on the fence perimeter.
- Switch off the energizer and disconnect the Live (+) and Return lead-out wires from the energizer’s output terminals.
- Turn the energizer back on while it is completely disconnected from the fence.
- Touch the tip of your digital electric fence voltmeter to the energizer’s Live (+) terminal and the ground probe to the Earth (–) terminal.
- If the energizer reads 8,000V to 10,000V: The energizer is working properly. Your problem lies somewhere along the lead-out cables, fence wires, insulators, or grounding system.
- If the energizer reads low (under 5,000V) or zero: The fault is internal to the energizer, its power supply, or a failing backup battery. Check the mains fuse, inspect the 12V battery voltage, or have the unit serviced by a certified technician.
Problem 1: Low Voltage Along the Fence Line (Under 5,000V)
If the energizer outputs full power when disconnected, yet voltage plummets the moment you reconnect the fence, something is draining energy from the wires.
Common Causes & Fixes
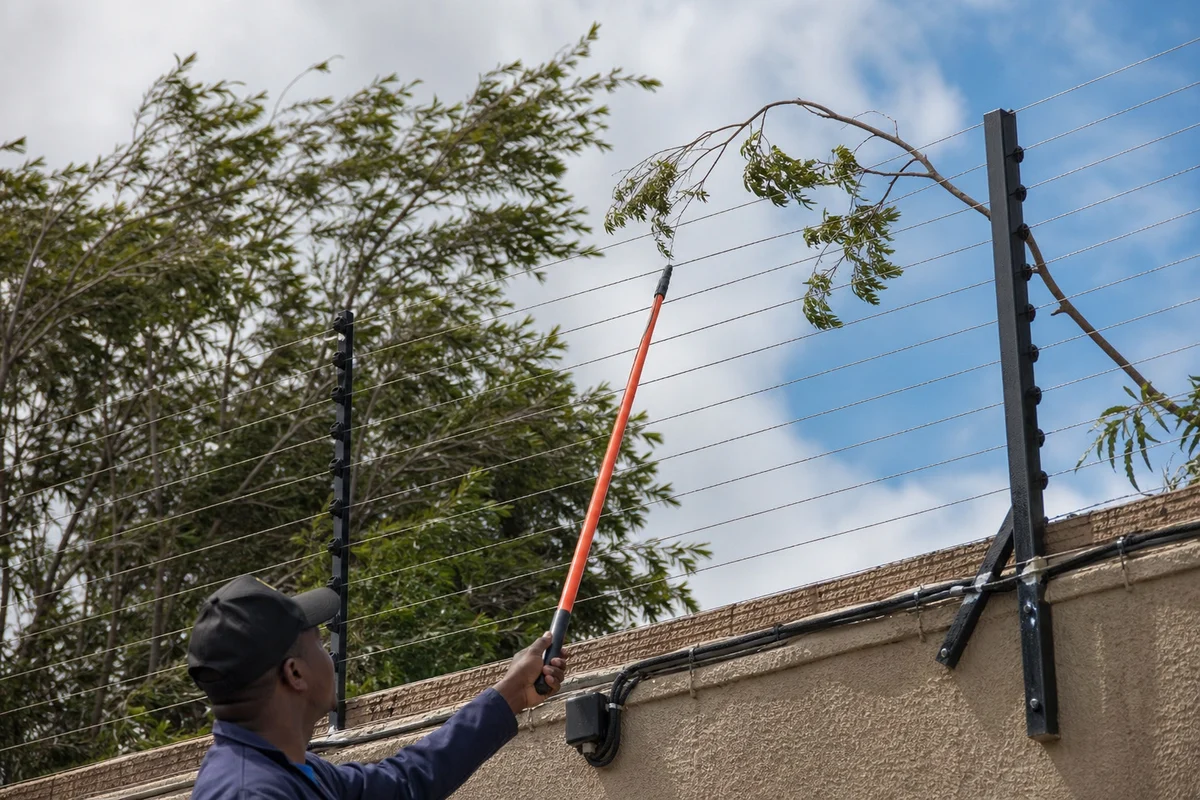
- Encroaching Vegetation (Most Common): Wet grass, tree limbs, or climbing vines touching a live wire bleed voltage directly into the ground. Walk the perimeter—especially after rain or wind—and trim back any foliage within 30 to 50 centimeters of the wires.
- Cracked or Dirty Insulators: Intense sunlight eventually makes plastic insulators brittle, causing hairline cracks that allow high-voltage sparks to jump straight into metal posts or walls. Listen closely while walking the fence in quiet conditions: a rhythmic “ticking” or “snapping” sound pinpoints the exact spot where electricity is arcing across a faulty insulator. Replace cracked insulators immediately and wipe coastal salt or heavy dust off dirty ones.
- Submerged or Damaged Under-Gate Cable: Underground lead-out cables running beneath driveways or gates can get nicked by garden spades, chewed by rodents, or flooded with groundwater if conduit seals fail. Disconnect the under-gate cable at both ends and test continuity; if voltage drops across that segment, replace the high-voltage cable.
- Tangled or Slack Wires: Thermal expansion can cause saggy live wires to touch neighboring grounded earth-return wires, creating a direct short circuit. Tighten loose ratchet tensioners and ensure tension springs sit at half-compression.
Problem 2: Dead Fence or Open Circuit Alarm (Zero Return Voltage)
Modern security energizers monitor the electrical loop continuously. If the return voltage suddenly drops to zero while the outgoing terminal still pulses strongly, you have an open circuit—meaning the continuous path around the perimeter has been broken.
Common Causes & Fixes
- Broken Wire or Snapped Ferrules: High winds, falling branches, or attempted tampering can snap a strand or pull a wire loose from a corner strain insulator. Visually inspect corners and tensioners for dangling wires and rejoin breaks using proper line clamps or crimp ferrules—never loose hand-twists, which corrode and arc.
- Dirty or Misaligned Gate Contacts: Sliding and swing gates rely on spring-loaded brass or stainless-steel contact plates to carry the circuit across the gate opening. Over time, dirt, grease, gate sag, or rust prevents clean contact. Clean the metal plates with fine emery paper and adjust the gate rollers or hinges so the contacts press firmly together when closed.
- Tripped Cut-Off Switch: Check that no one accidentally left an inline zone cut-off switch in the “Off” position after gardening or maintenance work.
Problem 3: Frequent False Alarms (Especially at Night or During Rain)
Few things undermine confidence in a security system faster than an electric fence alarm waking the household every time it drizzles or gets windy. False alarms are rarely random—they indicate a borderline weakness that tips over the edge when weather conditions change.
| Trigger Pattern | Most Likely Culprit | How to Fix It |
| Alarms only during rain or heavy morning dew | Dirty/cracked insulators or damp leaves brushing wires | Wash salt/dust off insulators; replace UV-cracked bobbins; cut back foliage further from wires. |
| Alarms during windy nights | Loose wires swinging together or swaying tree branches | Tighten ratchet tensioners; trim overhanging branches outside the fence corridor. |
| Alarms late at night when temperatures drop | Metal wires contracting in cold air, pulling weak joints or gate contacts apart | Check tension spring travel; realign sliding gate contacts for deeper spring compression. |
| Random alarms with no visible fence fault | Failing 12V backup battery or loose energizer terminal screws | Test battery under load (replace if older than 3–4 years); tighten all terminal lugs on the energizer. |
Problem 4: Weak Shock Despite High Voltmeter Readings
Sometimes a voltmeter shows 8,000V on the fence wire, yet anyone or anything touching the fence feels barely a mild tingle. This classic symptom almost always points to a grounding (earthing) failure.
When the ground rods cannot collect returning current from dry soil, the circuit never closes properly. To verify and fix:
- Short the live wire to the ground 100 meters away using steel stakes.
- Measure voltage on your earth rods; if it reads above 300V, your earth system has too much resistance.
- Water the soil around your earth stakes, tighten corroded earth clamps, or drive additional 1.8m to 2.0m ground rods spaced at least 3 meters apart.
Quick Diagnostic Summary: The “Divide and Conquer” Method
On large compounds or multi-kilometer farm perimeters, walking every meter looking for a fault wastes valuable time. Instead, use the Divide and Conquer method:
- Open the cut-off switch halfway around your perimeter to disconnect the second half of the fence.
- Check voltage at the energizer: if voltage jumps right back up to 8,000V+, the fault is inside the disconnected second half; if voltage stays low, the fault is inside the connected first half.
- Repeat this split across remaining zones until you narrow the problem down to a single 50-meter stretch, where visual inspection or an audible arc check will reveal the exact fault within minutes.